


Illuminate Your Mini Pack: How to String Lightshow Wires

June 13, 2024
Written by Michelle McPherson, lunchbox fam
Did you know that the Mini Pack was built with lightshow wire loops? Just cause it's small doesn't mean it doesn't deserve to stand out! Here's a quick tutorial on how to make your Mini Pack shine brightly!
STANDARD WEAVE

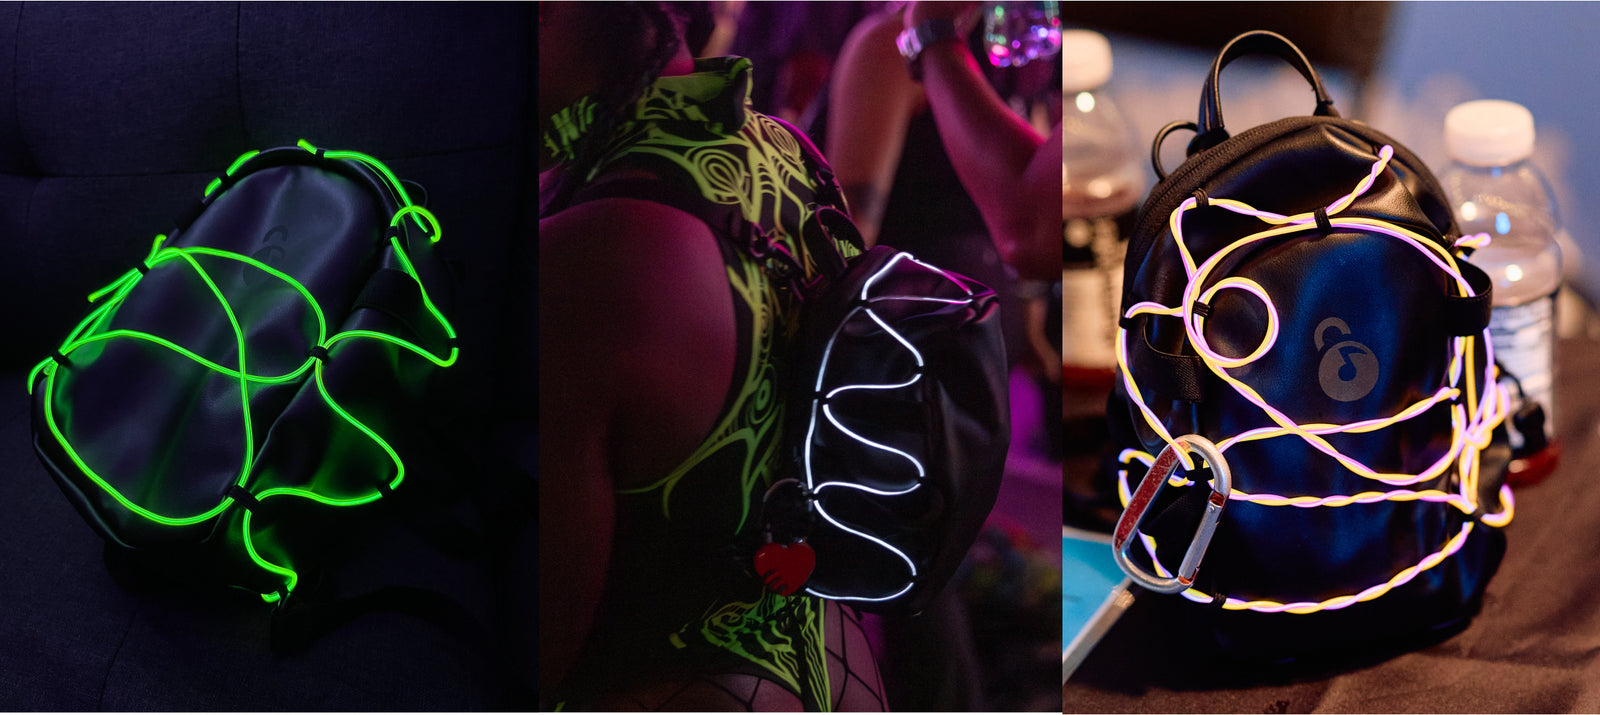
I made two different designs to give you an idea of the endless opportunities. The first design is a standard weave, which is nice and simple.
- Identify the small slit on the bottom of your Mini Pack.
- String your lightshow wire through the slit so that the connecting part (black part of the wire with a connecting bit) is inside the pack. Make sure to stuff all the black part of the wire inside and only let the translucent part come out of the slit.
- Use the elastic loops to string your wire through to create your design. You can go vertically up the pack, horizontally across the pack, or zig zag. Let your creativity run free.
- Once you get towards the end of the wire, find a loop to tuck it into so that it doesn't flail around when you dance.
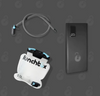
- Connect the lightshow wire to the inverter inside the pack and power the inverter on by pushing the button.
- Tuck the inverter into the side pocket across from the wallet card slots. Voila!
BRAIDED WIRES

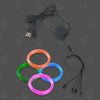
If you want to get a lil crafty, you can braid your lightshow wires to showcase different colors an designs.
- Pick 2 lightshow wire colors of your choosing. Braid them together before you even touch the pack to make the process easier.
- Identify the slit at the bottom of the pack and insert the connecting parts (black part of the wire with a connecting bit) of the 2 wires through the little slit into the pack. Only let the translucent part come out of the slit.
- Holding the two tips of the braided wires together, string them through the elastic loops and create your design. You can go vertically up the pack, horizontally across the pack, or zig zag. Let your creativity run free.
- Once you get towards the end of the wire, find a loop to tuck it into so that it doesn't flail around when you dance.
- Connect the lightshow wire to the inverter inside the pack to a 2 way wire splitter (sold separately) then to the 2 individual lightshow wire connecting bits and power the inverter on by pushing the button.
- Tuck the inverter into the side pocket across from the wallet card slots. Voila!
Pro-Tip: Since the Mini Pack is smaller than a lunchbox hydration pack, you may have some slack on your lightshow wire. You can either keep stringing them onto the pack until you've used it up, or tuck the remainder back into the slit which can be used to illuminate the interior of your pack.
With the power to design your mesmerizing light display, this accessory empowers you to diversify your style and make a statement that's uniquely yours. So why settle for just the basics, when you can create your design and let your personality shine?